


“Shading” is, perhaps, not the best word to use to describe the process of transforming a line drawing into a representation of a 3D form.
Shading implies merely adding shadow—but the artist must think about their work differently. They are not just adding shadows, but creating the effect of light.
The Homeschool Art Club is a community of life-long art students coming together to practice the skills of drawing creatively and from imagination. All skill levels are welcome—jump and experience the joy of drawing!
Shading v. Adding Tone or Value
Artists typically use words such as “tone” and “value” to describe what they do, because it includes every aspect of light and shadow, from bright highlights to deepest occlusion shadow.
tone
n. the overall effect of light and shadow in a picture
value
n. the relative degree of a color’s lightness or darkness
In most student work, their thinking process— “I’m shading my drawing by adding shadow to it” —results in pale, insufficient passages of shadow. This effect can certainly be used in particular circumstances—such as illustrating ghosts, reflections, and atmospheric perspective—but this is rarely the effect the student was after.
However, it is difficult to grasp the full range of value or the overall tonal design of a picture all at once, especially at the beginning of learning how to draw.
So, this drill is designed to bridge the gap, and make it as easy as possible for a student to learn how to add dynamic tone to their drawings.
I call this exercise “shading” because, if ever there was a good time to use the word, this would be it. The thinking in doing this exercise is to shade the basic forms—but to use the full range of values to accomplish it.
Once a student is familiar with this formula it is a significantly smaller step to shift one’s thinking into terms of light.
Box: Shading Formula
The box is the simplest of our shading formulas for each of the Four Basic Forms: Box, Cylinder, Cone, and Sphere.
However, the box has its own bit of trickiness in practice: its smooth sides call for very even tones, which is the main objective of our practice this week. (As a side benefit, we’ll memorize the shading formula for the box.)
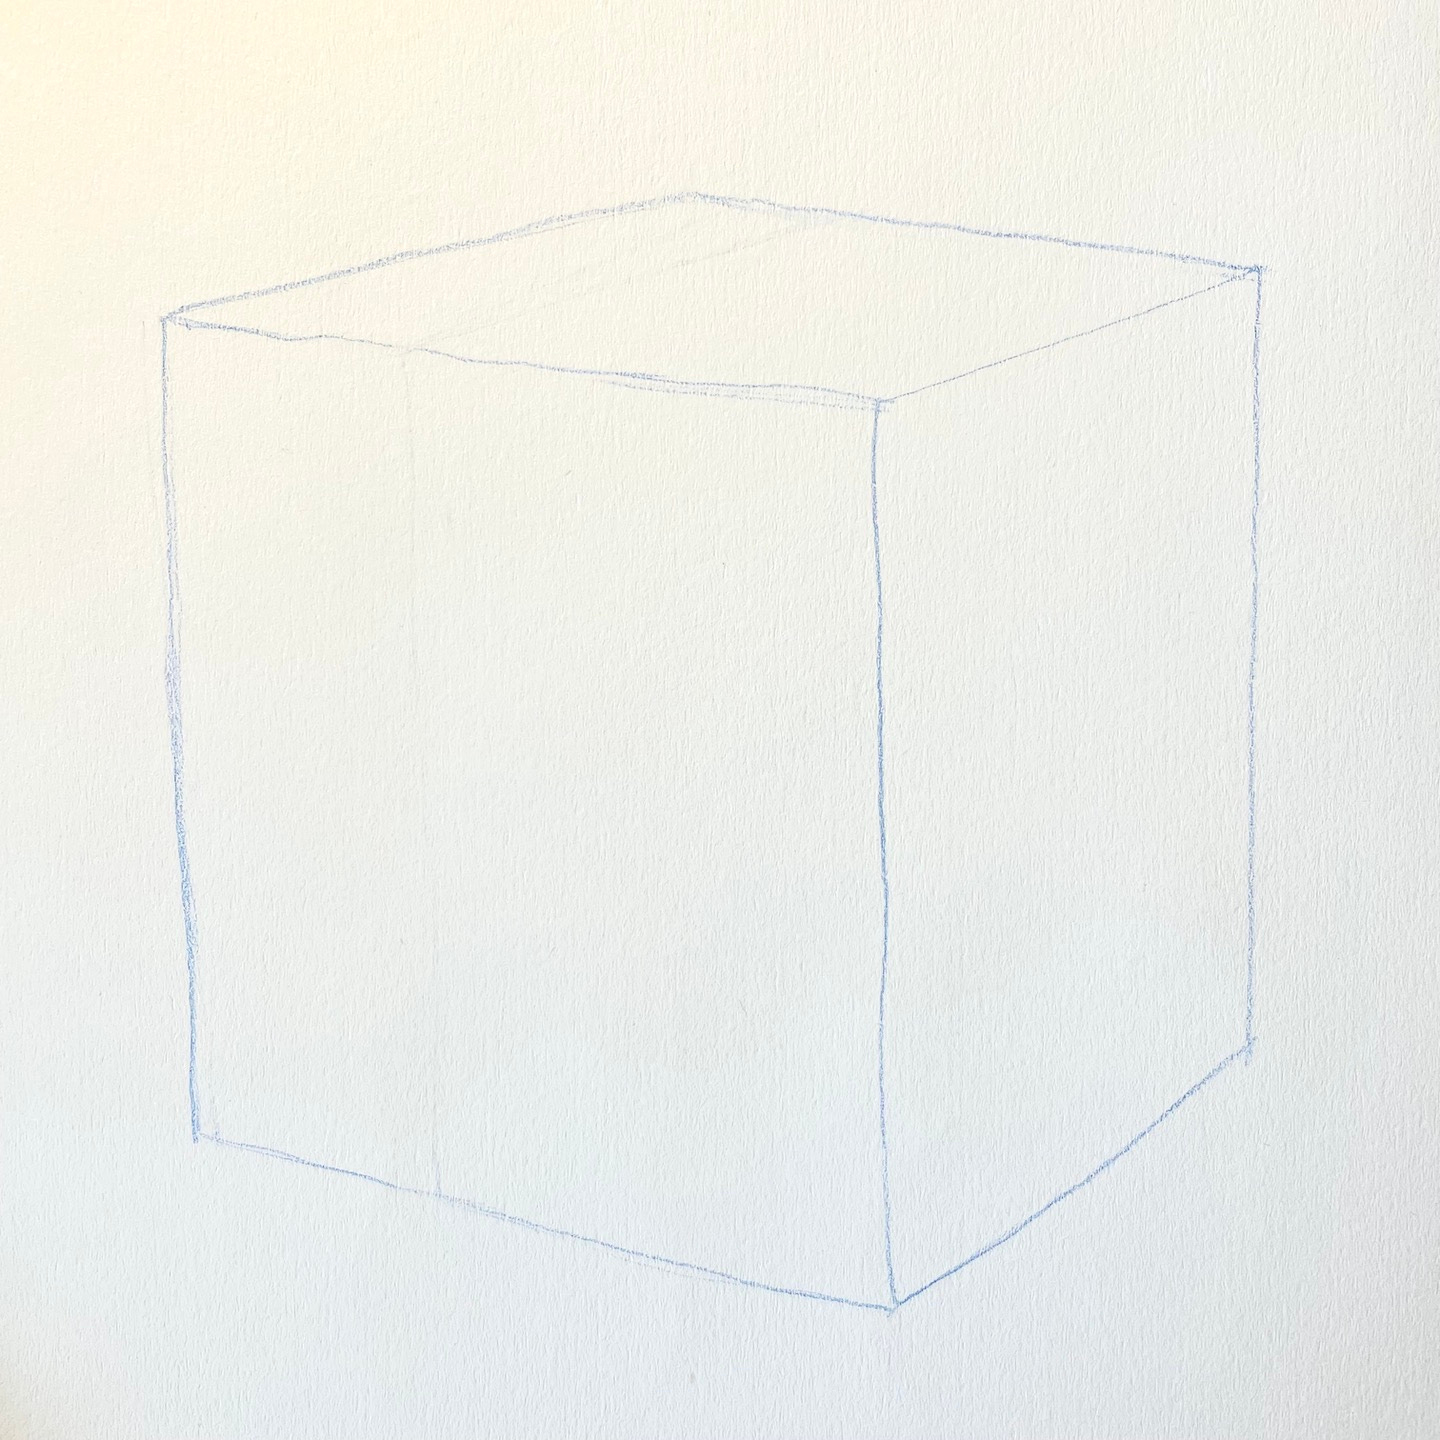
Start by drawing a box. Any sort of box will do, but apply what you know of intuitive or linear perspective to make it look like a proper 3D box. And make it a good size—at least 3.5-4 inches or so wide. No need to measure or use a ruler—practice training your eye.
Next, practice making a dark-value, even tone on one of the upright sides. Use an overhand grip and the long edge of your pencil rather than the point. Only make vertical or up-and-down strokes to keep the tone even and neat.
TIP: Use removable tape (such as washi tape) or hold a ruler along the edges, to block off your pencil and prevent it from going over the lines. (It’s a good idea to practice so that you don’t need these tools, but that isn’t the point of this drill, so no need to be unnecessarily frustrated if you’re having trouble.) Perfection is not necessary for this exercise.
If you’re unable to get a nice dark tone with one pass (nearly impossible, unless you have a very dark pencil), go over it a few times in the same direction, evenly, to build up the tone to as dark a gray as you can manage.
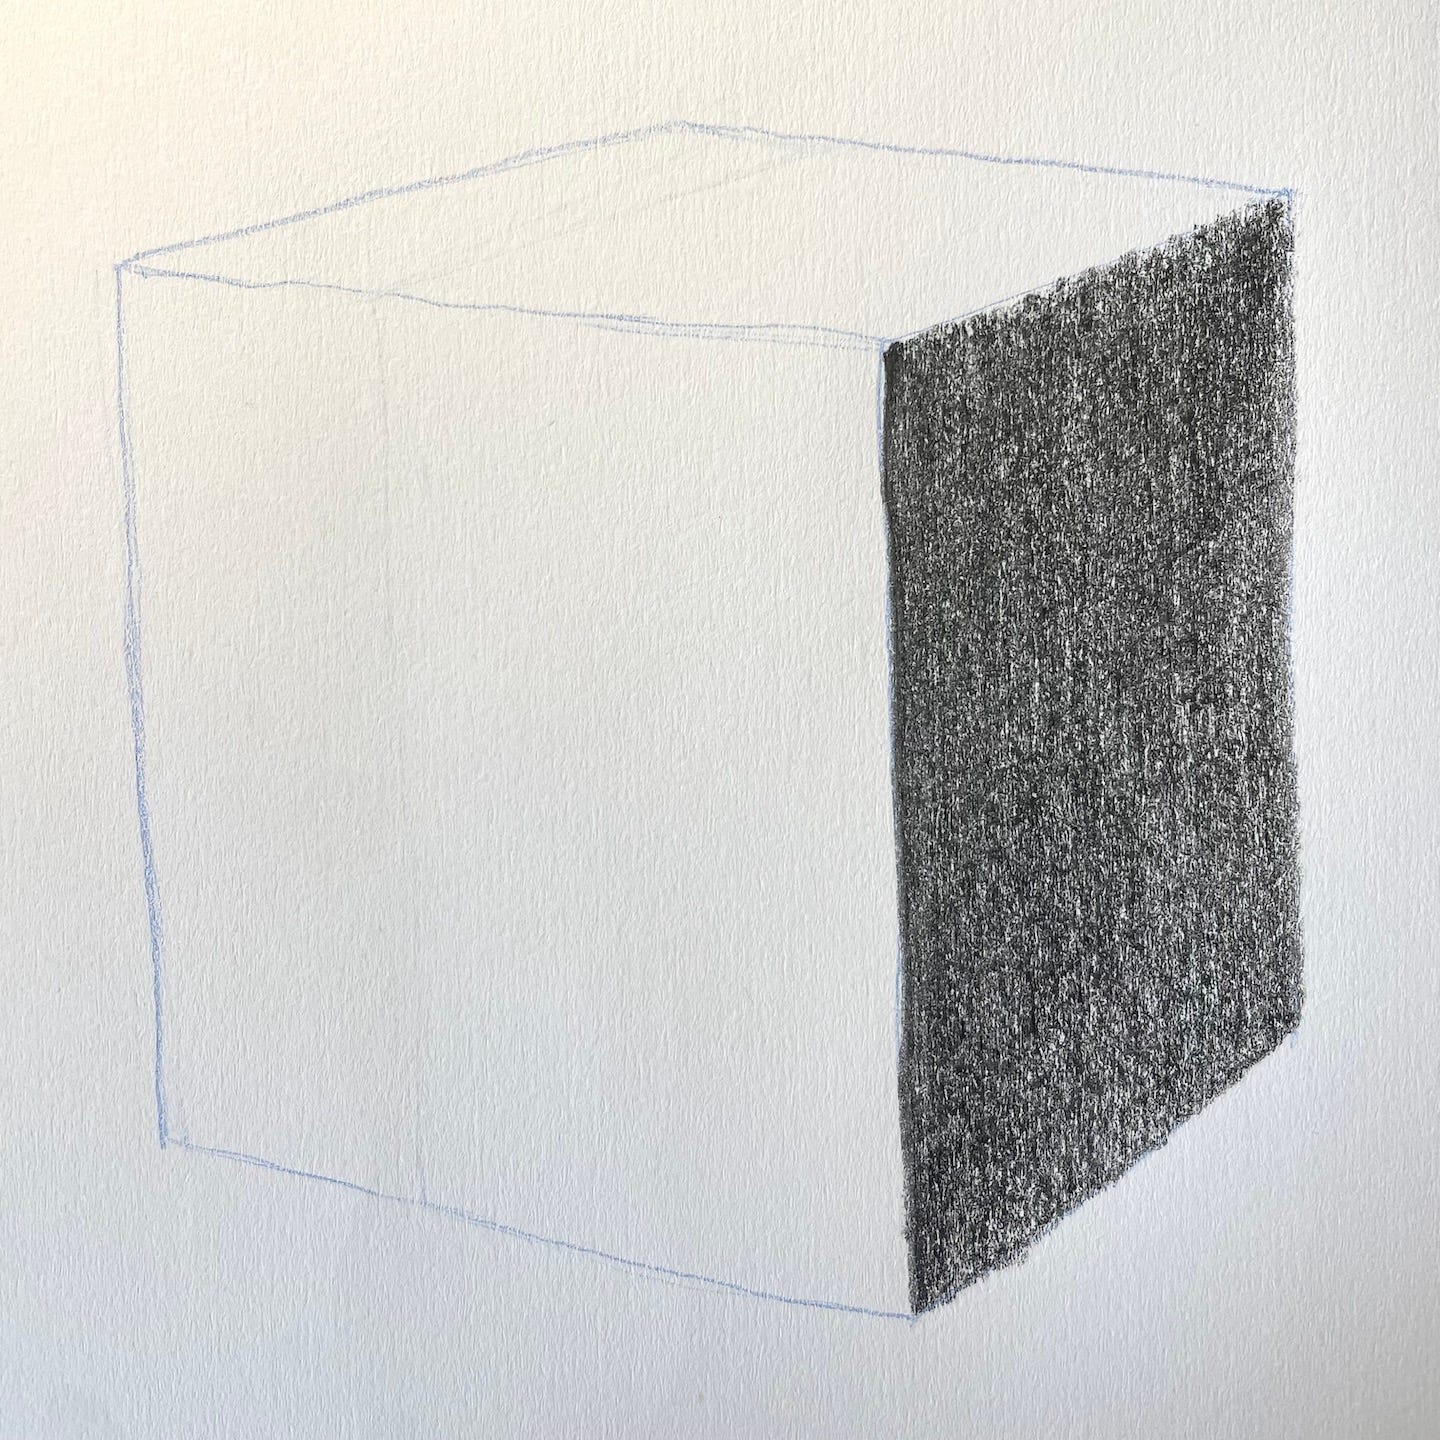
Next, still using the pencil in the same way and making only vertical strokes, shift to the second upright plane. For this one, create an even middle-value tone. Try to make it a value halfway between the dark you just created and the white of the paper.
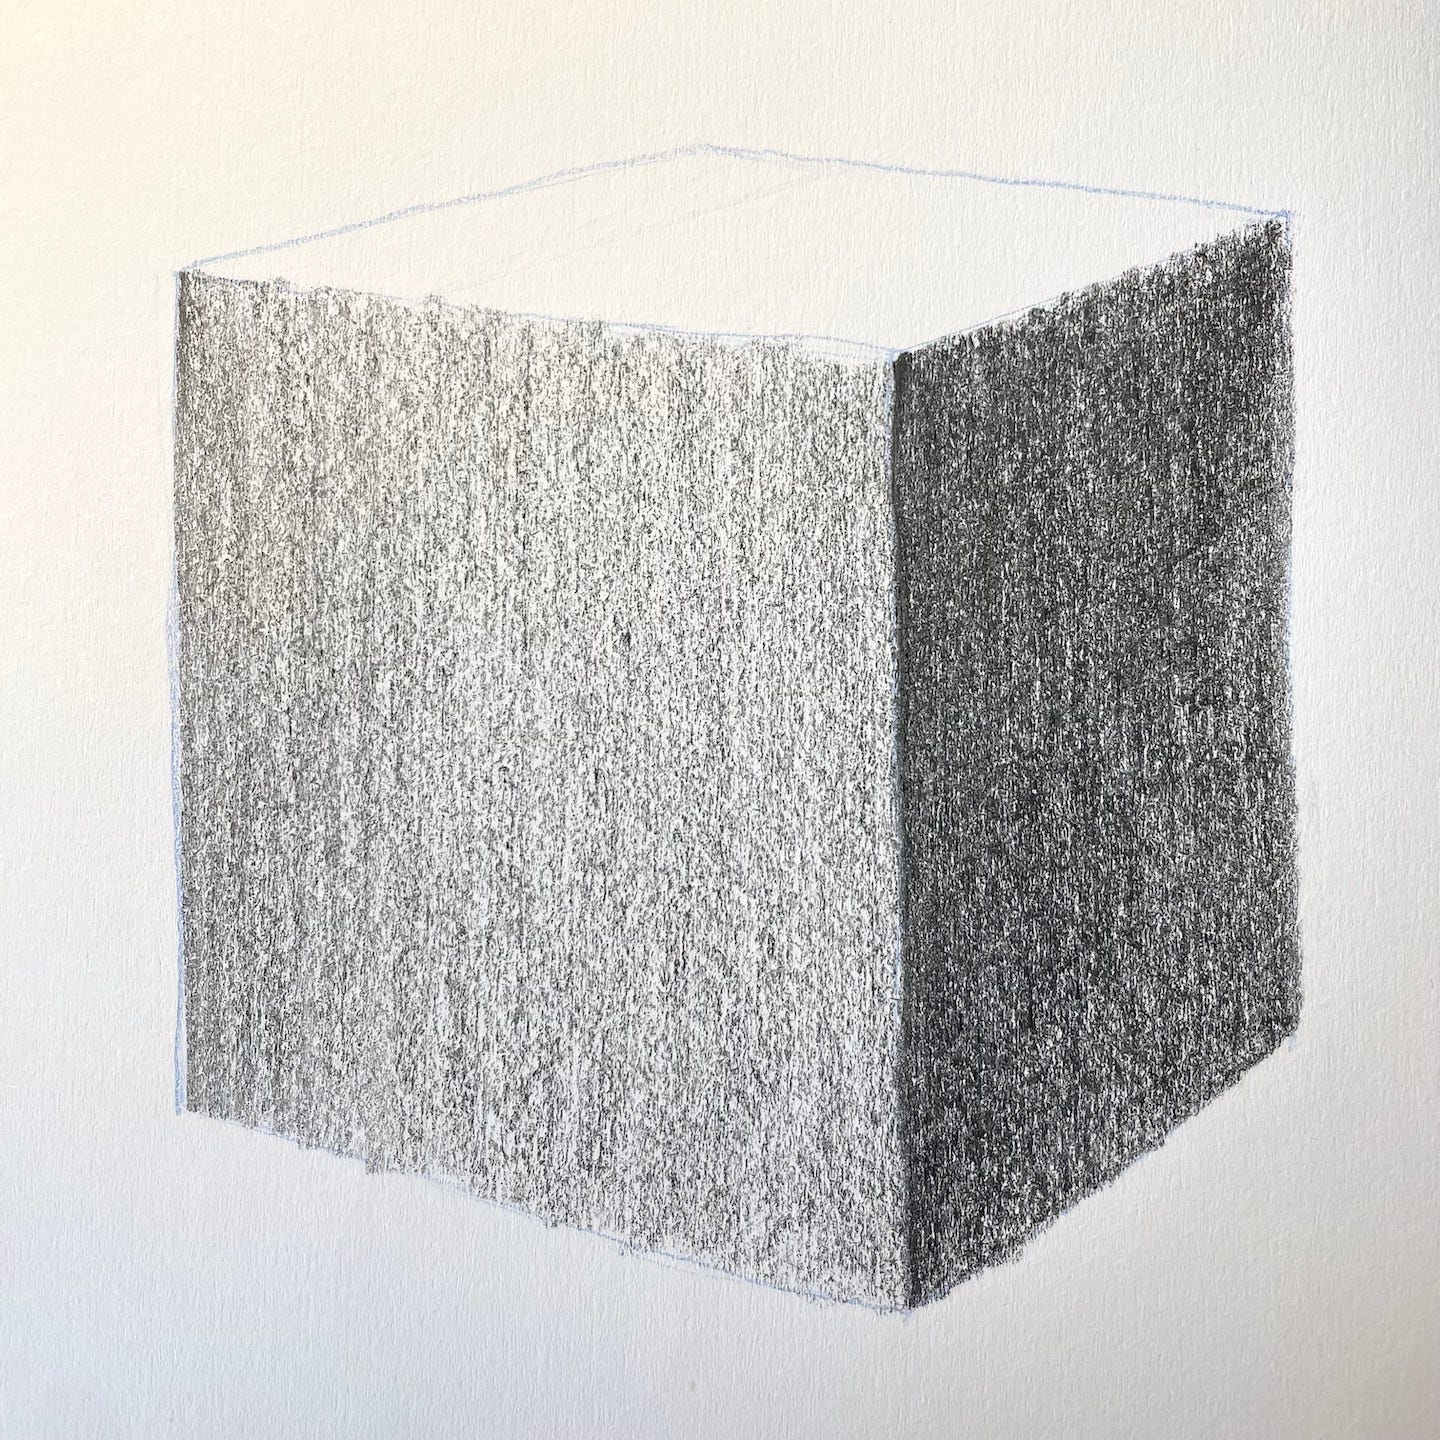
The top plane of the box is the one on which the light falls directly, and so we leave that one white.

Once you have memorized and practiced this simple formula—one light side, one middle-value side, and one dark side—it is a simple matter to start looking at real-life objects and reference (or invent your own in your imagination) and observe the differences between reality and formula, what might be and what is.
In real life, light often falls on box-shaped objects in ways that are similar to this formula—but in this case… And as you fill in the blank, you will start to see how to apply tone to create a specific box in certain lighting conditions, rather than a formulaic one.
The formula is a starting point. It gives your mind something to latch onto, a frame of reference on which to hang (and simplify) the multitude of observations that occur while drawing.
That’s it for this week, folks!
