The Cone has an angled curved surface—how does that affect the way it reflects light?
With this shading formula, we begin to consider the effects of light on form—the beginning of making the transition from “shading” to “adding tone and value” to our drawings.
The Homeschool Art Club is a community of life-long art students coming together to practice the skills of drawing creatively and from imagination. All skill levels are welcome—jump and experience the joy of drawing!
Learning formulas is an essential part of the imaginative artist’s repertoire. There’s simply too much to think about when drawing from our head. Especially while we are still learning how to draw, formulas give us a framework with which to develop coherent, realistic drawings.
We’re not limited to the formulas once we’ve learned them; they just give us a baseline or frame of reference upon which to invent creatively.

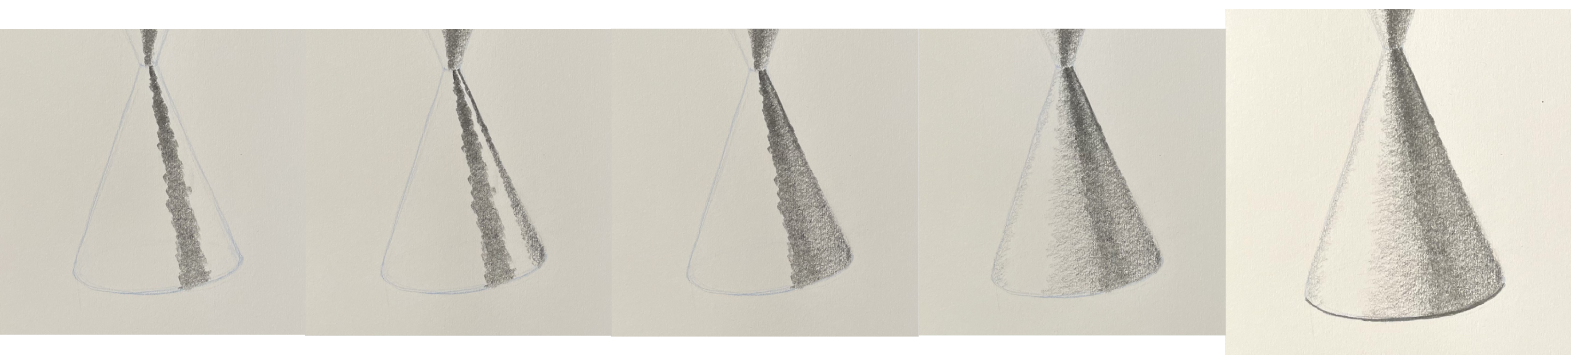
Cone: Basic Shading Formula
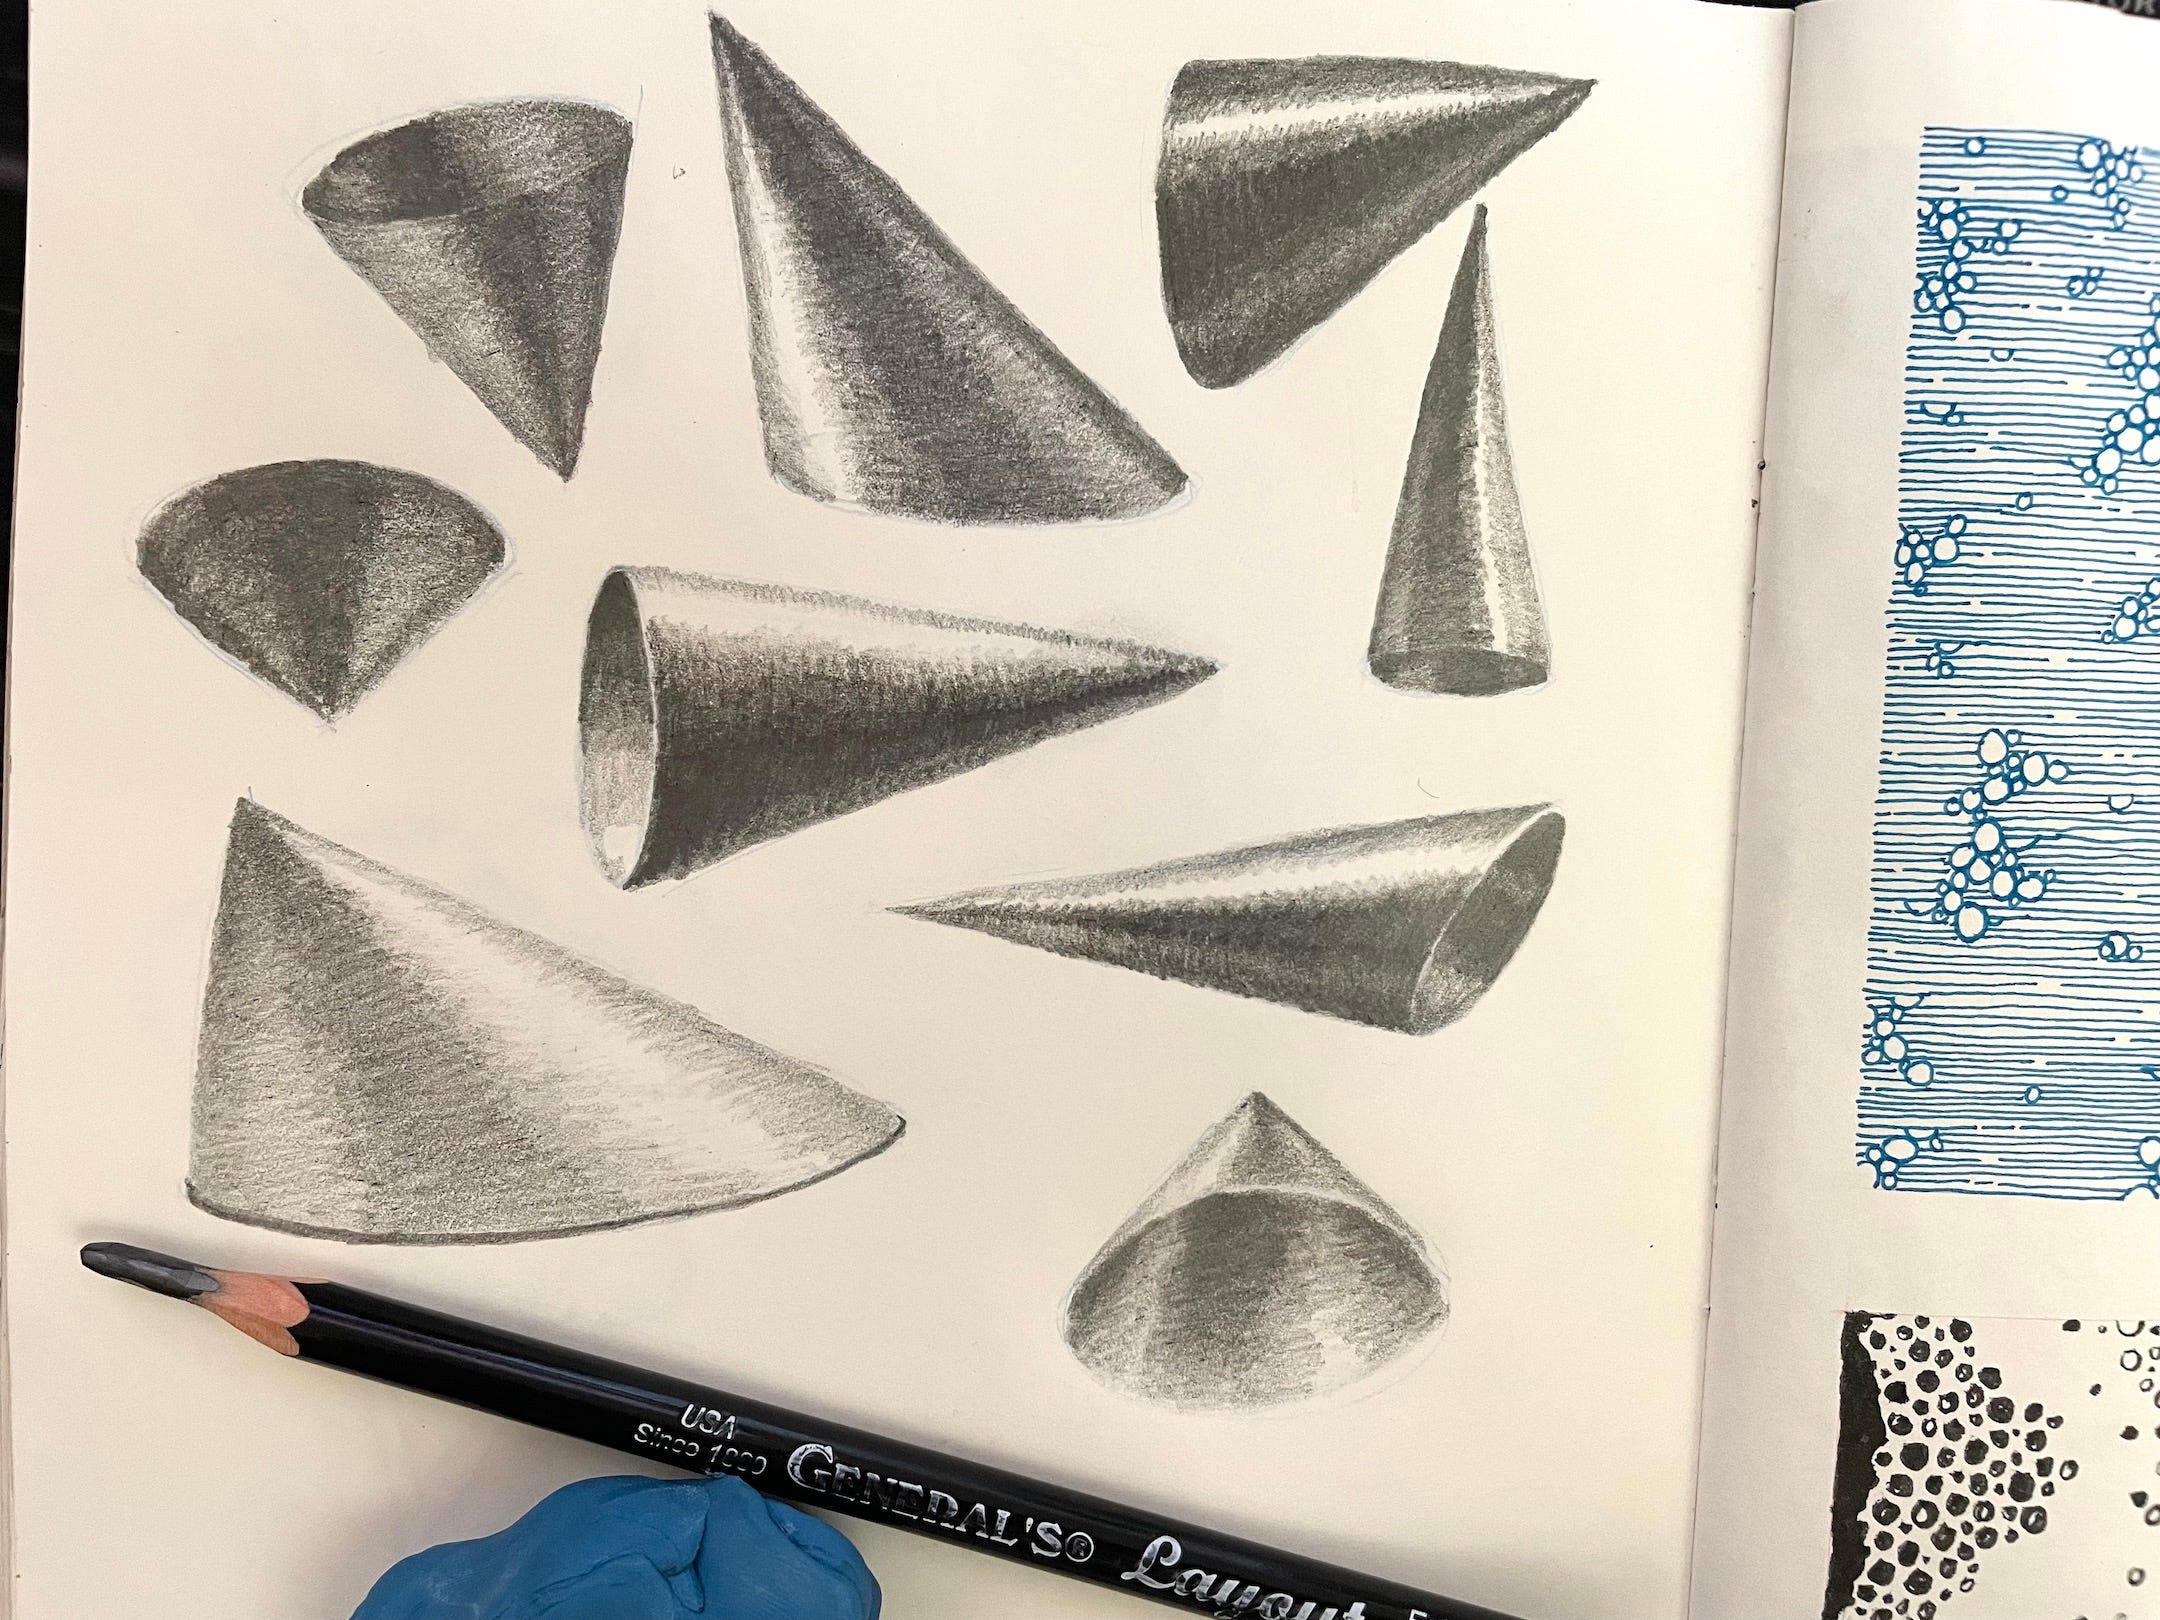
Start by drawing a cone. Make it a good size one, at least for your first attempt—you want to have enough space to move your pencil point back and forth comfortably, even at the narrow tip of the cone.
As we’ve discussed before, the cone is quite similar to the cylinder. The most basic shading formula for the cone is a modified version of the cylinder formula we’ve practiced before:

In the case of the Cone, the “pillars” of dark shading taper, following the triangular form of the cone. Other than that, however, the formula remains the same.


This modification makes for an excellent 2-minute Warm-Up. Give it a try on cones of various shapes. One way to practice is to fill a page with cones, and then, throughout the day and week, shade one or two cones at a time.
Once you’ve learned the formula and gotten in some practice, you might give the following two additional variations of the Cylinder/Cone formula a try this week.
These build on the base formula, and begin to show how it can be used in differing light conditions.

Cone: The Influence of Reflected Light
The Cone has an angled surface, which may reflect light differently than other vertical or horizontal subjects in a picture. As you practice doodling your shaded cones for practice, consider whether the cone’s surface is tilted away from or toward the light source.
In addition, like any subject, it may show reflected light, which is light that bounces off of the surroundings back onto the subject. The lighter middle section between the dark side of the cylinder/cone formula is the formula’s representation of reflected light.
There are two other ways that reflected light commonly appears in cylindrical or cone-like subjects, and the following tutorial of a double-cone or “hourglass” shape demonstrates both.
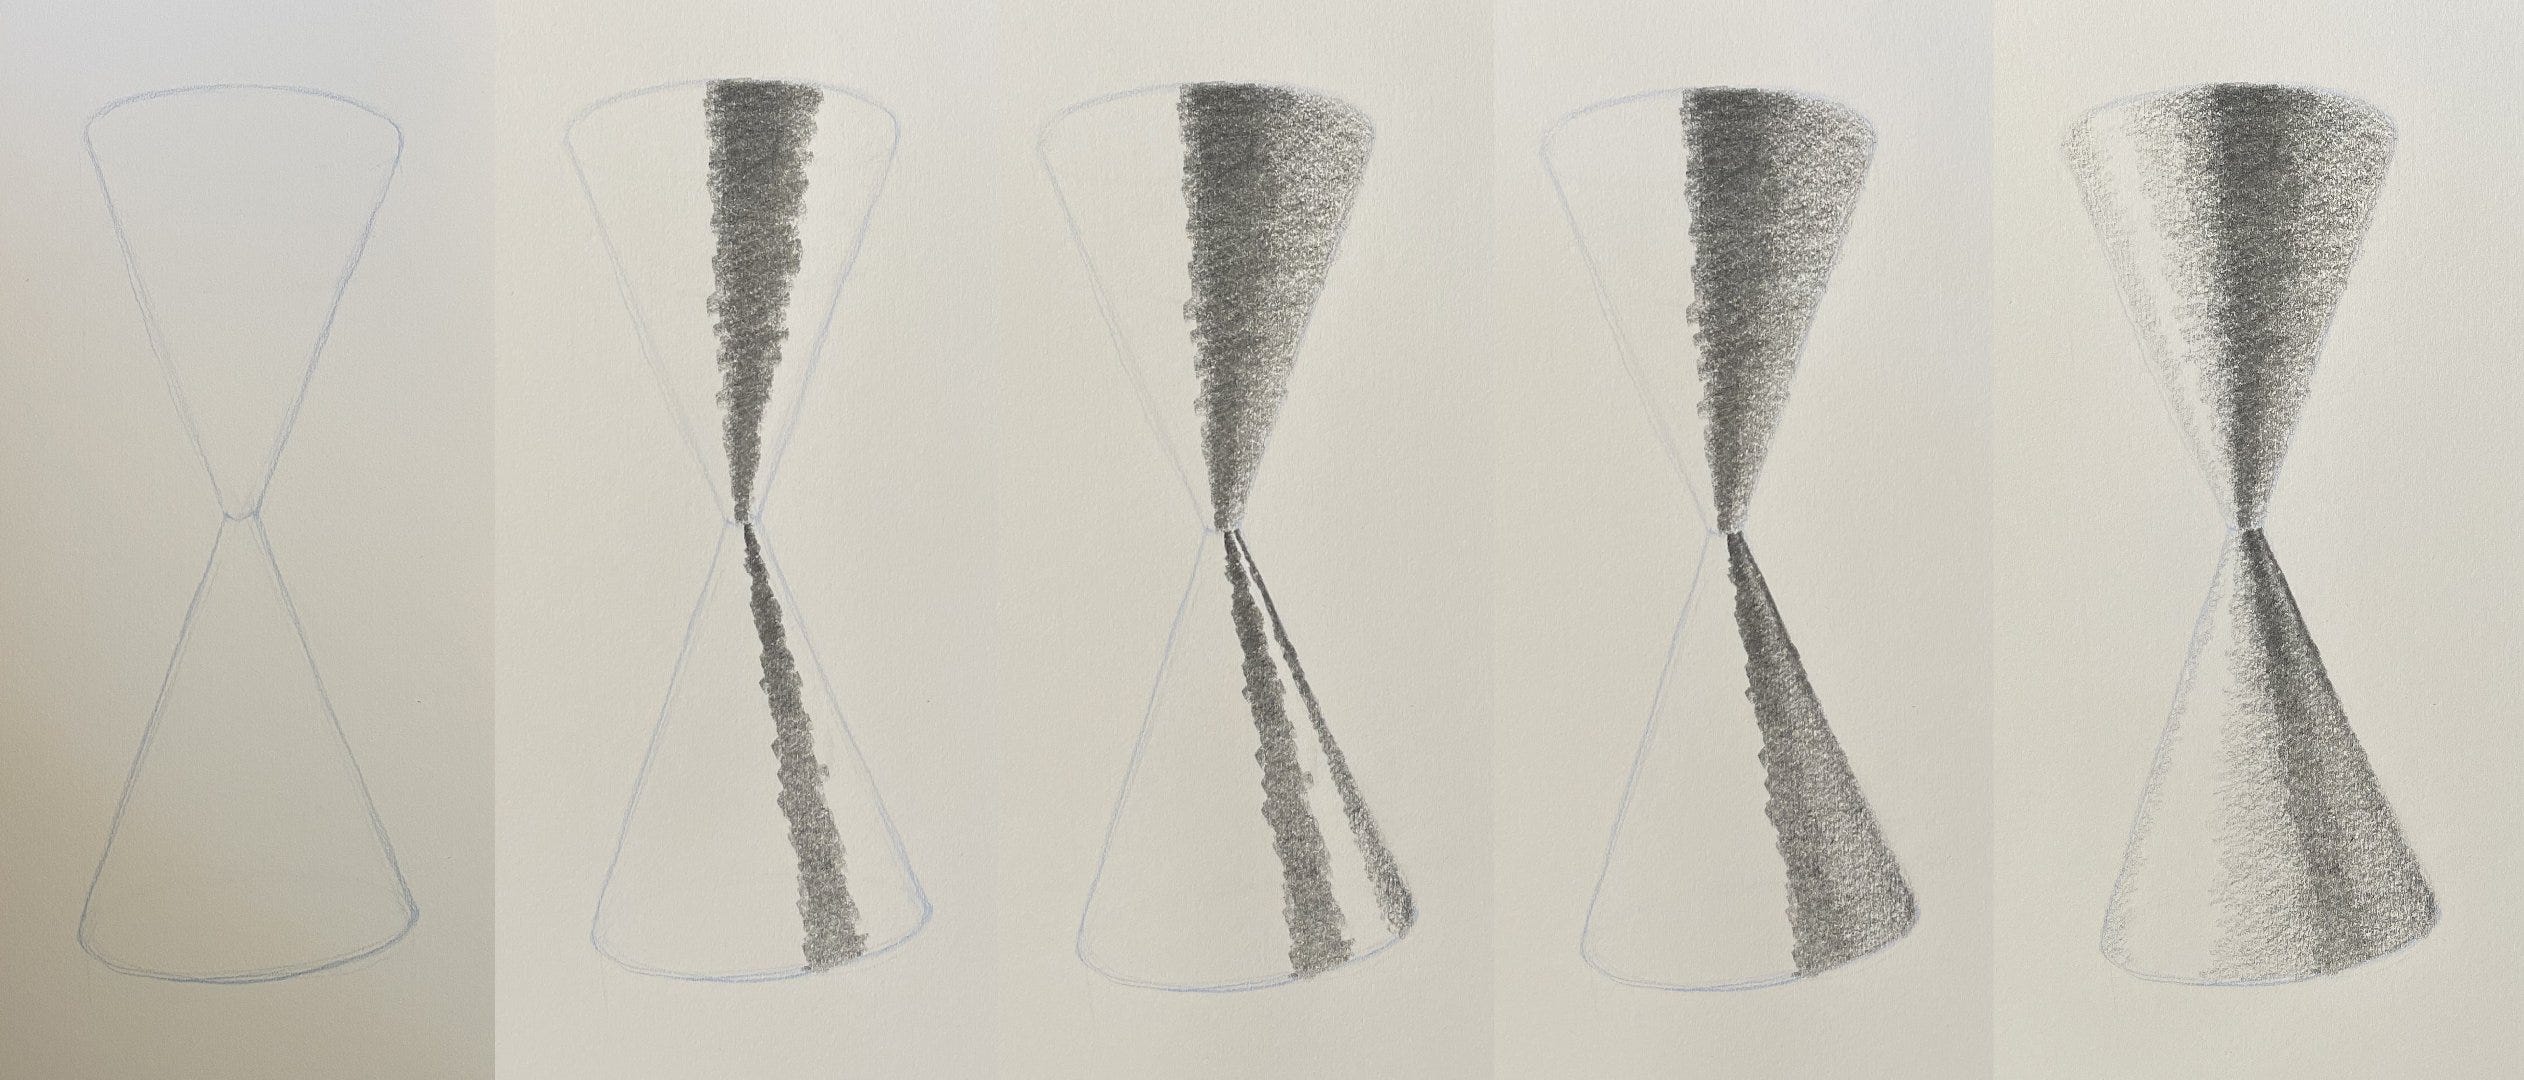
We imagine the light source to be above and to the left. The top cone is slightly tilted away from this light source, and is darker. The reflected light in this special case floods the entire right side of the cone, instead of there being a dark edge.
NOTE: Even in cases where you observe this type of lighting condition, be aware that the shadow side must always be darker than the light side. The lightest dark is always darker than the darkest light.
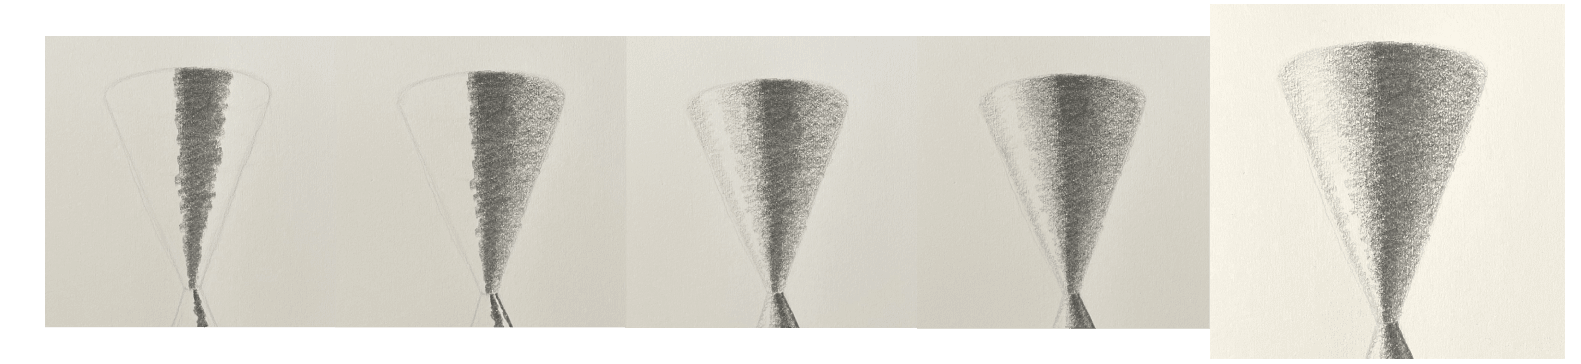
The bottom cone shows a different pattern. The same basic shading formula that we’ve already learned is used here—but now there is a gradient in it. It is darker at the top and lighter as it goes toward the bottom.
Gradations like this, whether from top to bottom or bottom to top, are common lighting effects, as well as design strategies for strong compositions.
I demonstrated both in one drawing, which you may do as well. However, feel free to practice any of these three different formulas, separately, on any cones you draw this week in your practice.
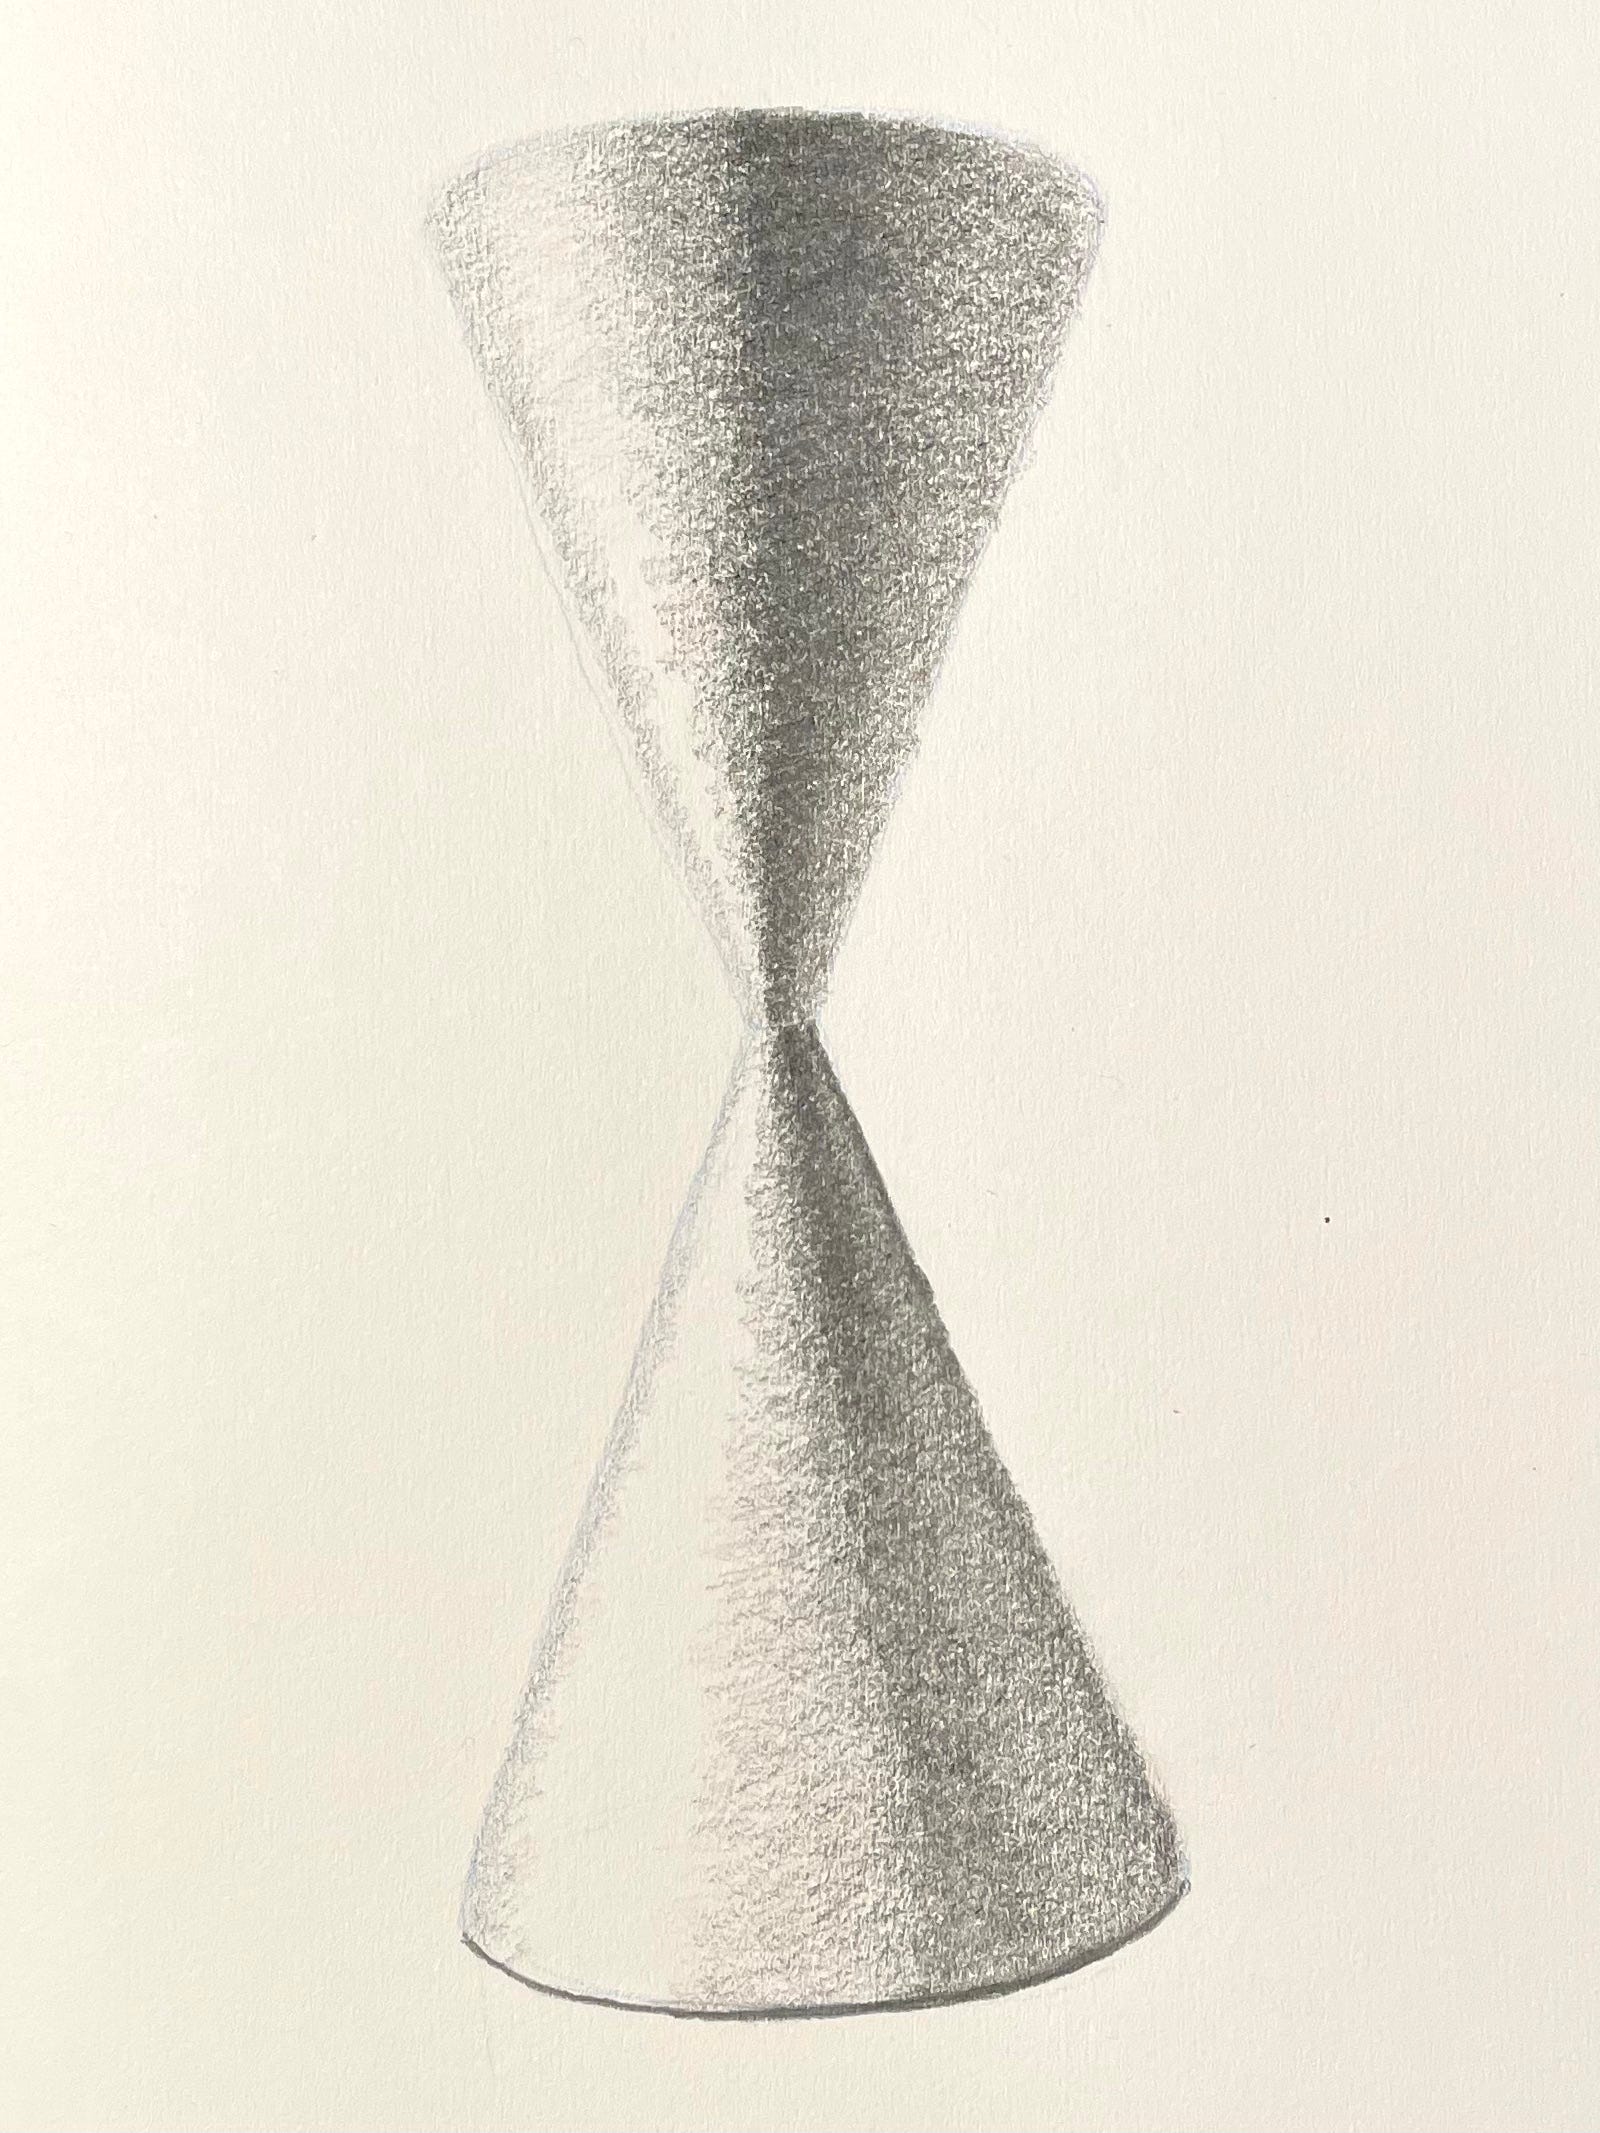
All three are worth memorizing and practicing until they become second nature. Start looking for them in your daily life, and consider which of the formulas is the closest representative of what you see.
That’s it for this week, folks!