


Unpacking the Box
Two Ways to Draw the Basic Form
Boxes are my favorite of the four basic forms. They immediately give a sense of weight and dimension to a sketch, and their sharp angles can give a sense of life and energy. They’re also the easiest form to use for putting subjects in perspective. Mastering the box may well be the most important skill of an imaginative artist!
Skills in this Drawing Mechanics lesson:
Drawing a box in intuitive 1-point perspective
Drawing a box in intuitive 2-point perspective
The Box: Method 1
The key idea with drawing a box is using three sets of parallel lines. I will color-code lines that should be parallel to each other in my examples so that you always know which lines should match. You may find it useful to color-code your first few drawings as well.
Step 1
Start with a rectangle of any dimensions: square, wide, or tall. The key idea is to make the top and bottom lines parallel with each other, and the side lines parallel—two sets of parallel lines. (Make sure to leave some space around your rectangle for the rest of the drawing.)

We’re not doing math, so don’t use a ruler, and don’t measure. It is more important to train your eye and hand to draw neat, parallel lines than to draw perfect lines. It doesn’t have to be perfect. You will see my lines are often a little off—this gives a drawing “character.” We want to make them as neat and straight as we can, though, so we don’t sacrifice accuracy.
Use a single, confident line for each side—don’t draw a “hairy” box. If your lines are not quite parallel, instead of erasing just “restate” the line by drawing the correction.
TIP: In general, it’s better for your lines to overlap at the corners, instead of leaving gaps. Make your lines longer than you think you need them.


Step 2
Add three parallel lines from the corners. You can draw them from any corners you would like, but only three corners.


It is especially important for this step that these three lines are parallel. If they’re not quite parallel, it’s better for them to tilt slightly toward each other, or “inward,” and never to tilt outward. If one line tilts the wrong way, be sure to fix it before moving on to the next step.
Again, draw your lines with confidence. Restate them if necessary.


Step 3
In this step, we will “find” the back corners of our box by drawing two more lines. Notice that these two lines will be parallel to the lines we drew in Step 1.
Beware! It is very important that you do not “connect” the three lines from Step 2. These are almost never the right length, and connecting them will result in lines that are not parallel to the top and sides of the box.
Always draw these lines so that they are parallel to the top/bottom and sides of the box, even if you have leftover line sticking out, or have to make a line from Step 2 longer.


That’s it! Now you know how to draw a box starting with a rectangle. This gives us a box that has one side facing us.
If you’d like, after your box is done, you can erase the extra lines to “clean up” your drawing. But you don’t have to! These are just for practice.
Try drawing several more, including ones using different corners in Step 2.
The Box: Method 2
Instead of having a whole side of the box facing us, this second method gives us a box that is turned so that one corner is closer to us than the others.
Step 1
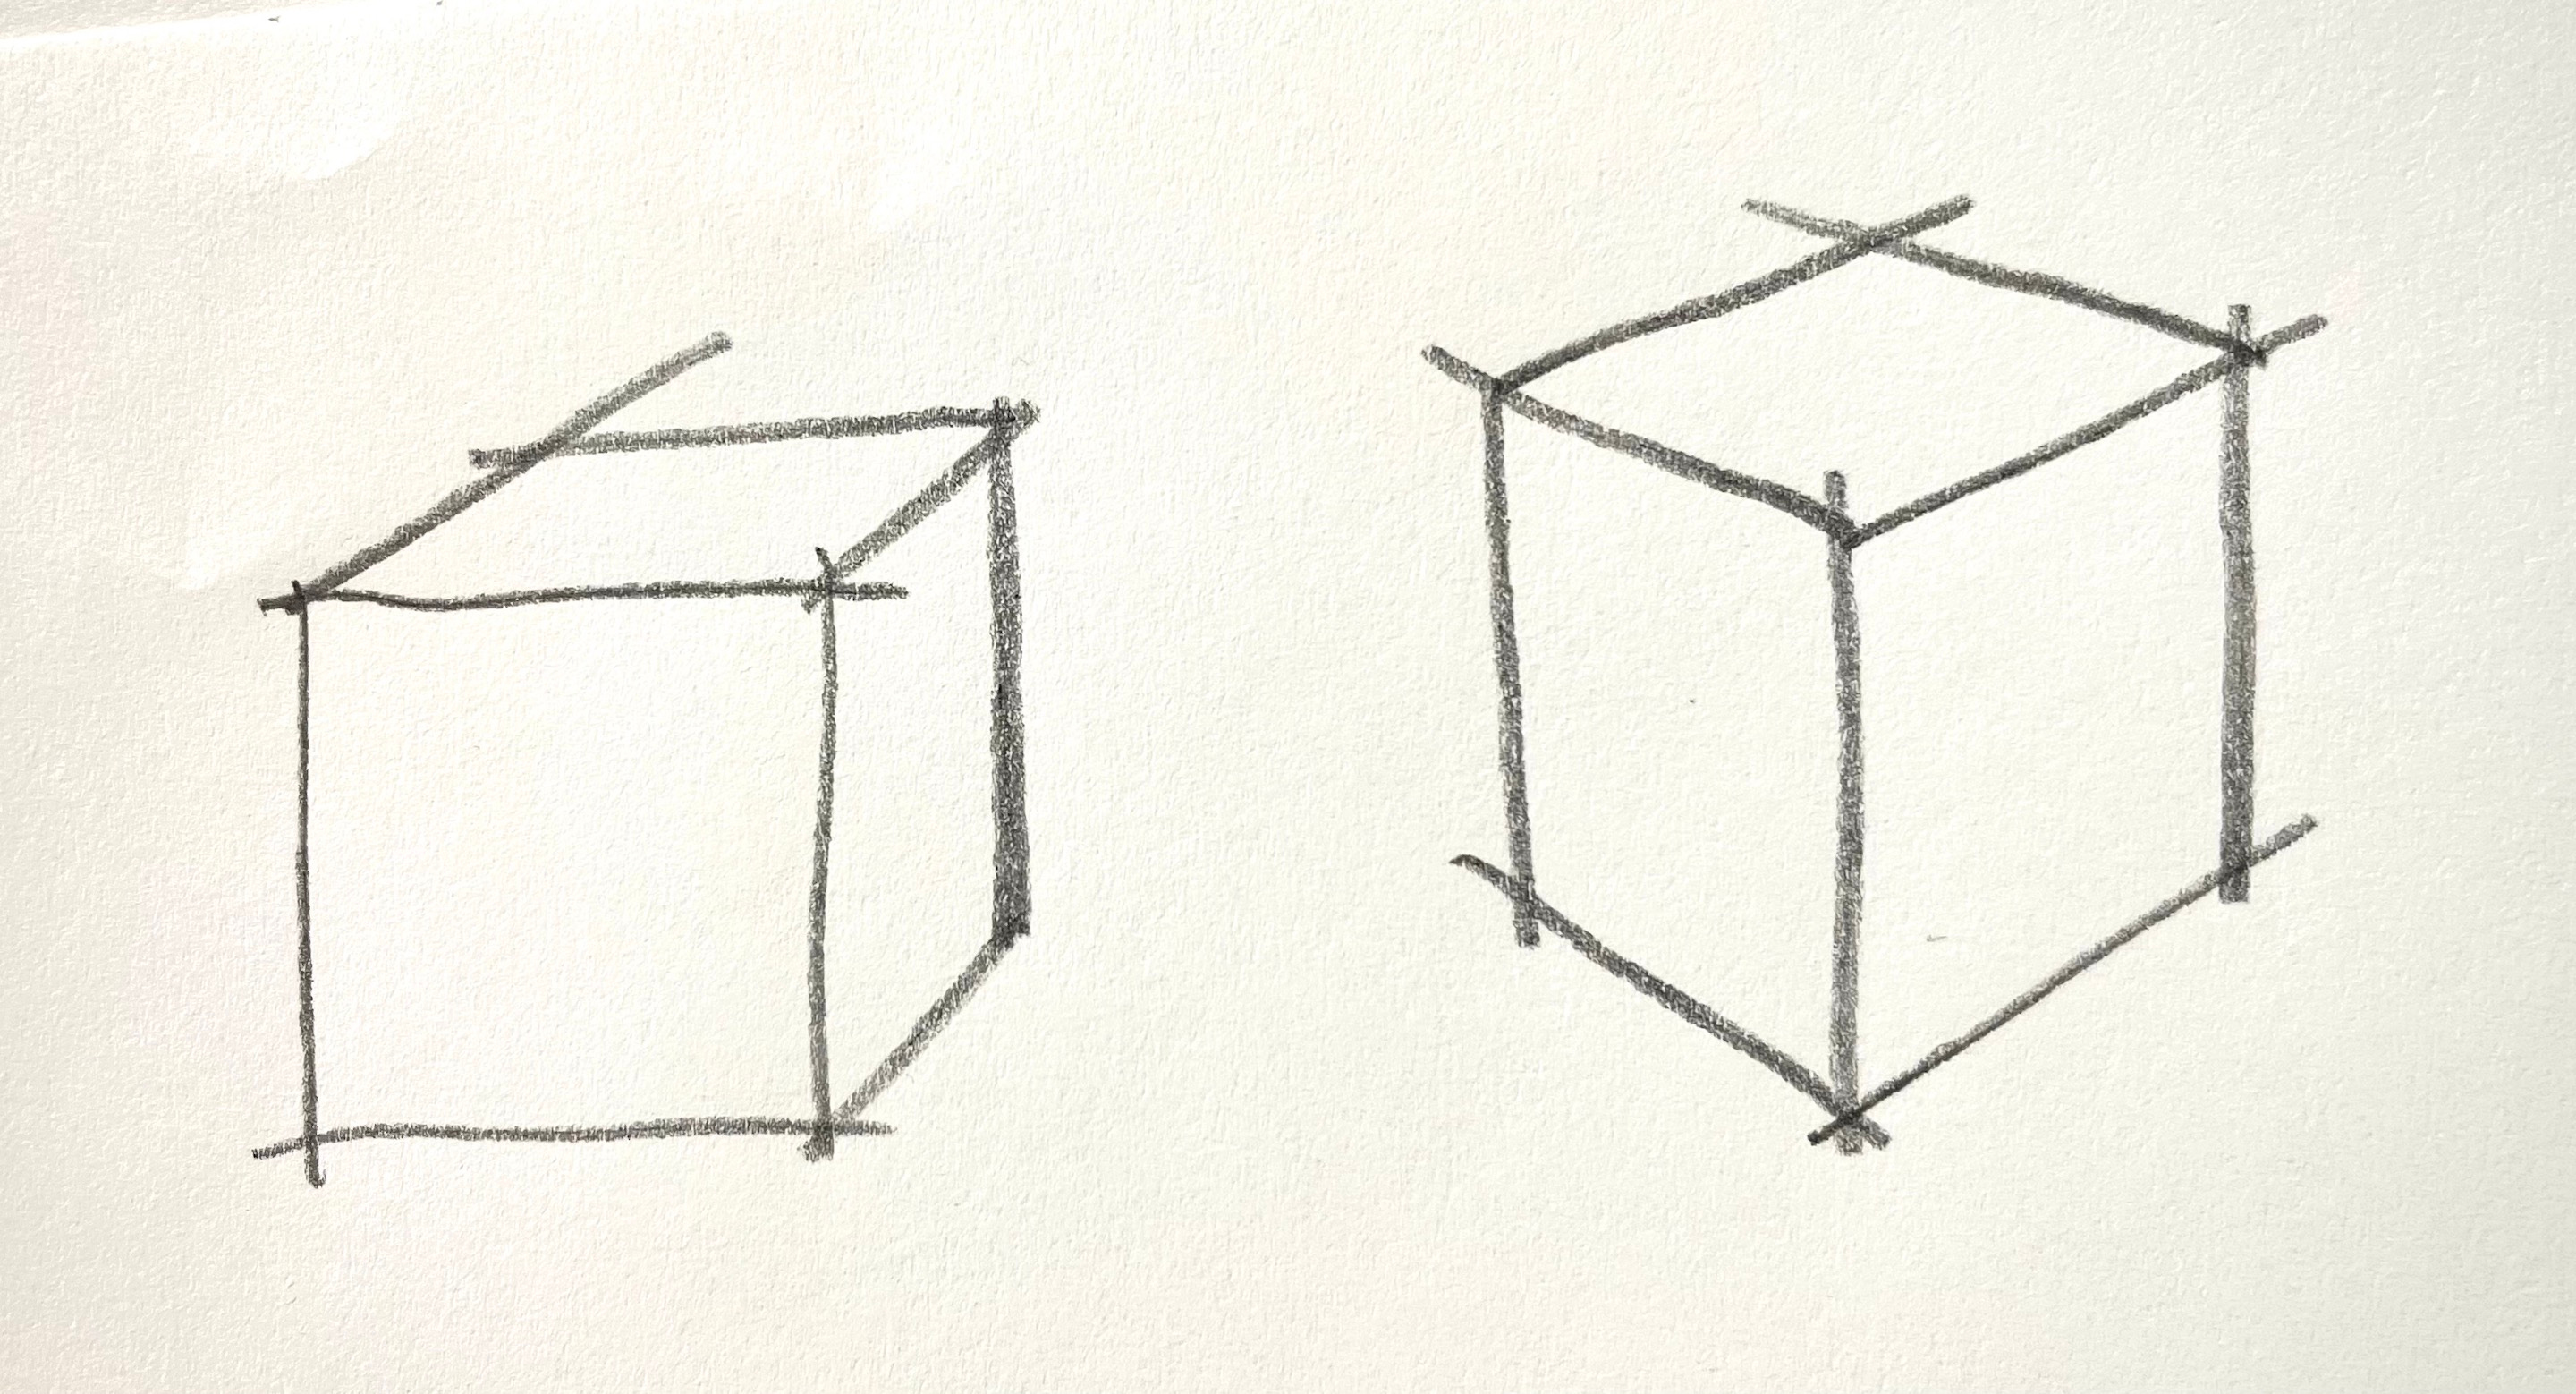
Start with three lines that make a Y shape.

Step 2
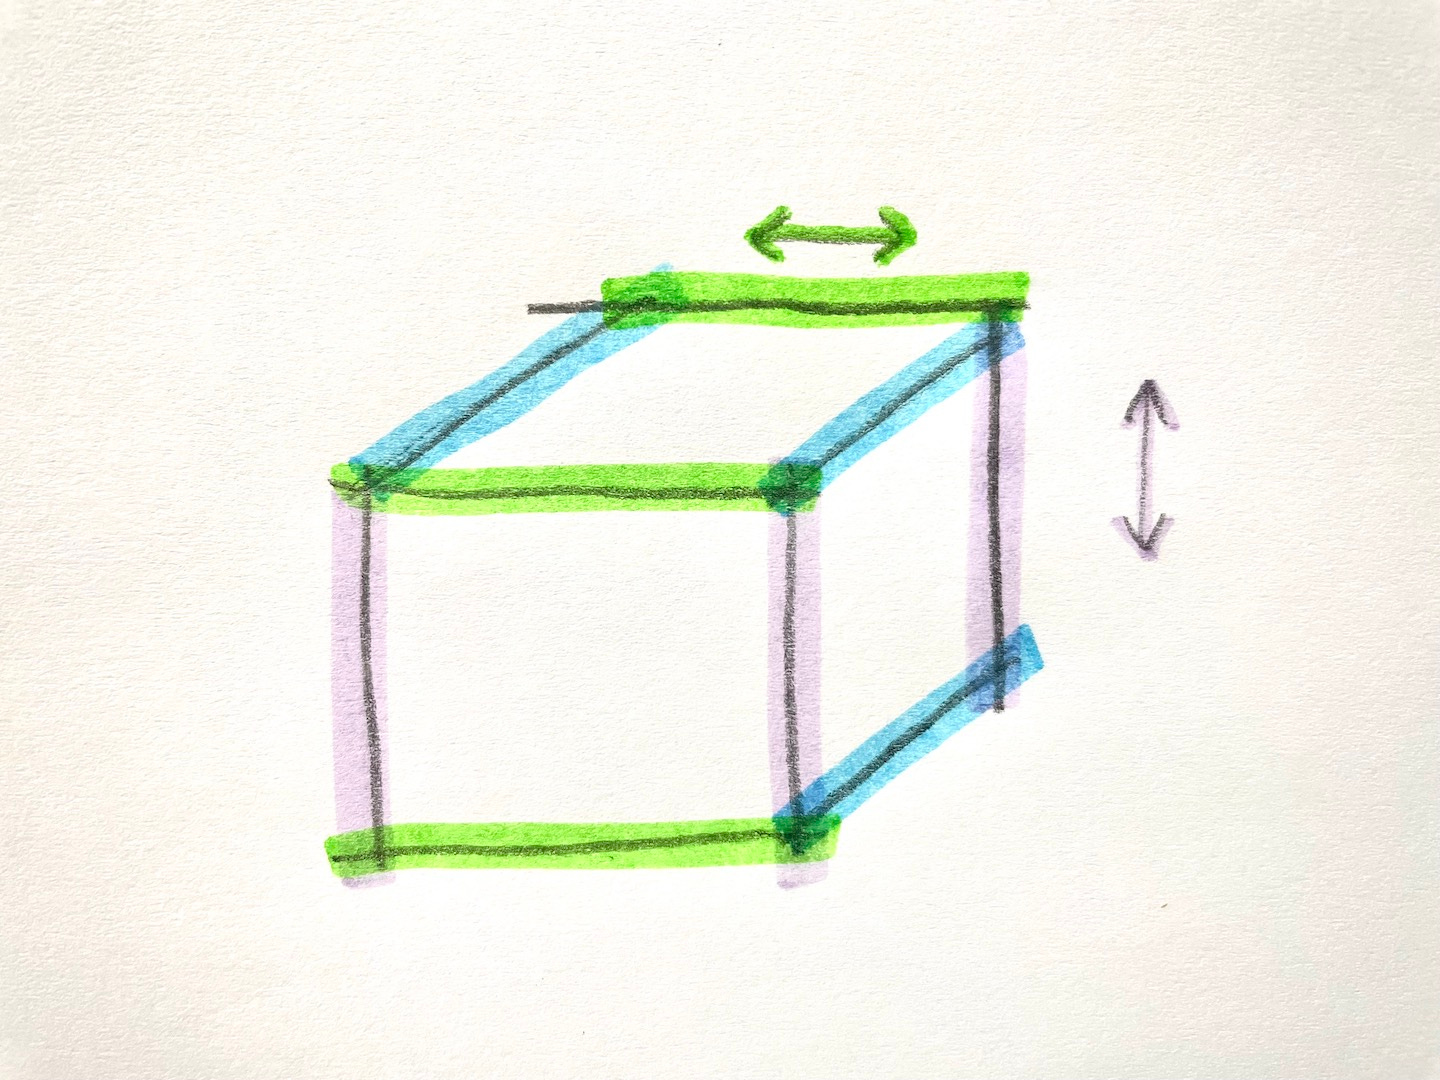
The three lines we drew in Step 1 show us what angles to match in making our parallel lines. As before, our box will have 3 sets of 3 parallel lines.
Next, we will draw two more lines to match the left-hand Y angle (green, in my example). Make them as parallel as you can.

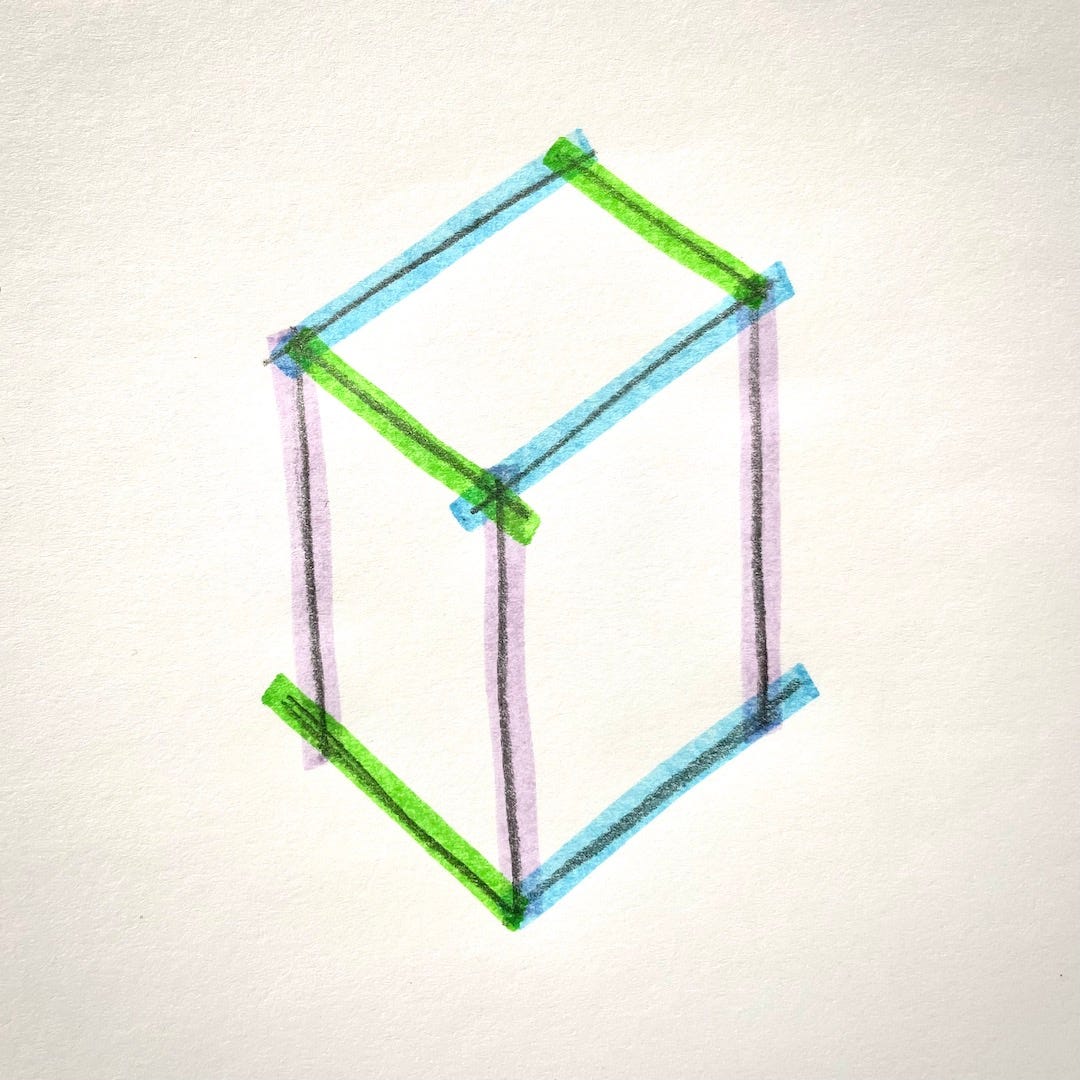
Step 3
Next, match the right-hand angles (blue, in my example) with two more lines.

Step 4
Finally, match the middle (purple) line with two more lines to complete the box. Again, it’s important you don’t “connect” the lines you drew in Steps 3-4. Focus on making all the (purple) lines parallel to each other.
Continue Drawing!
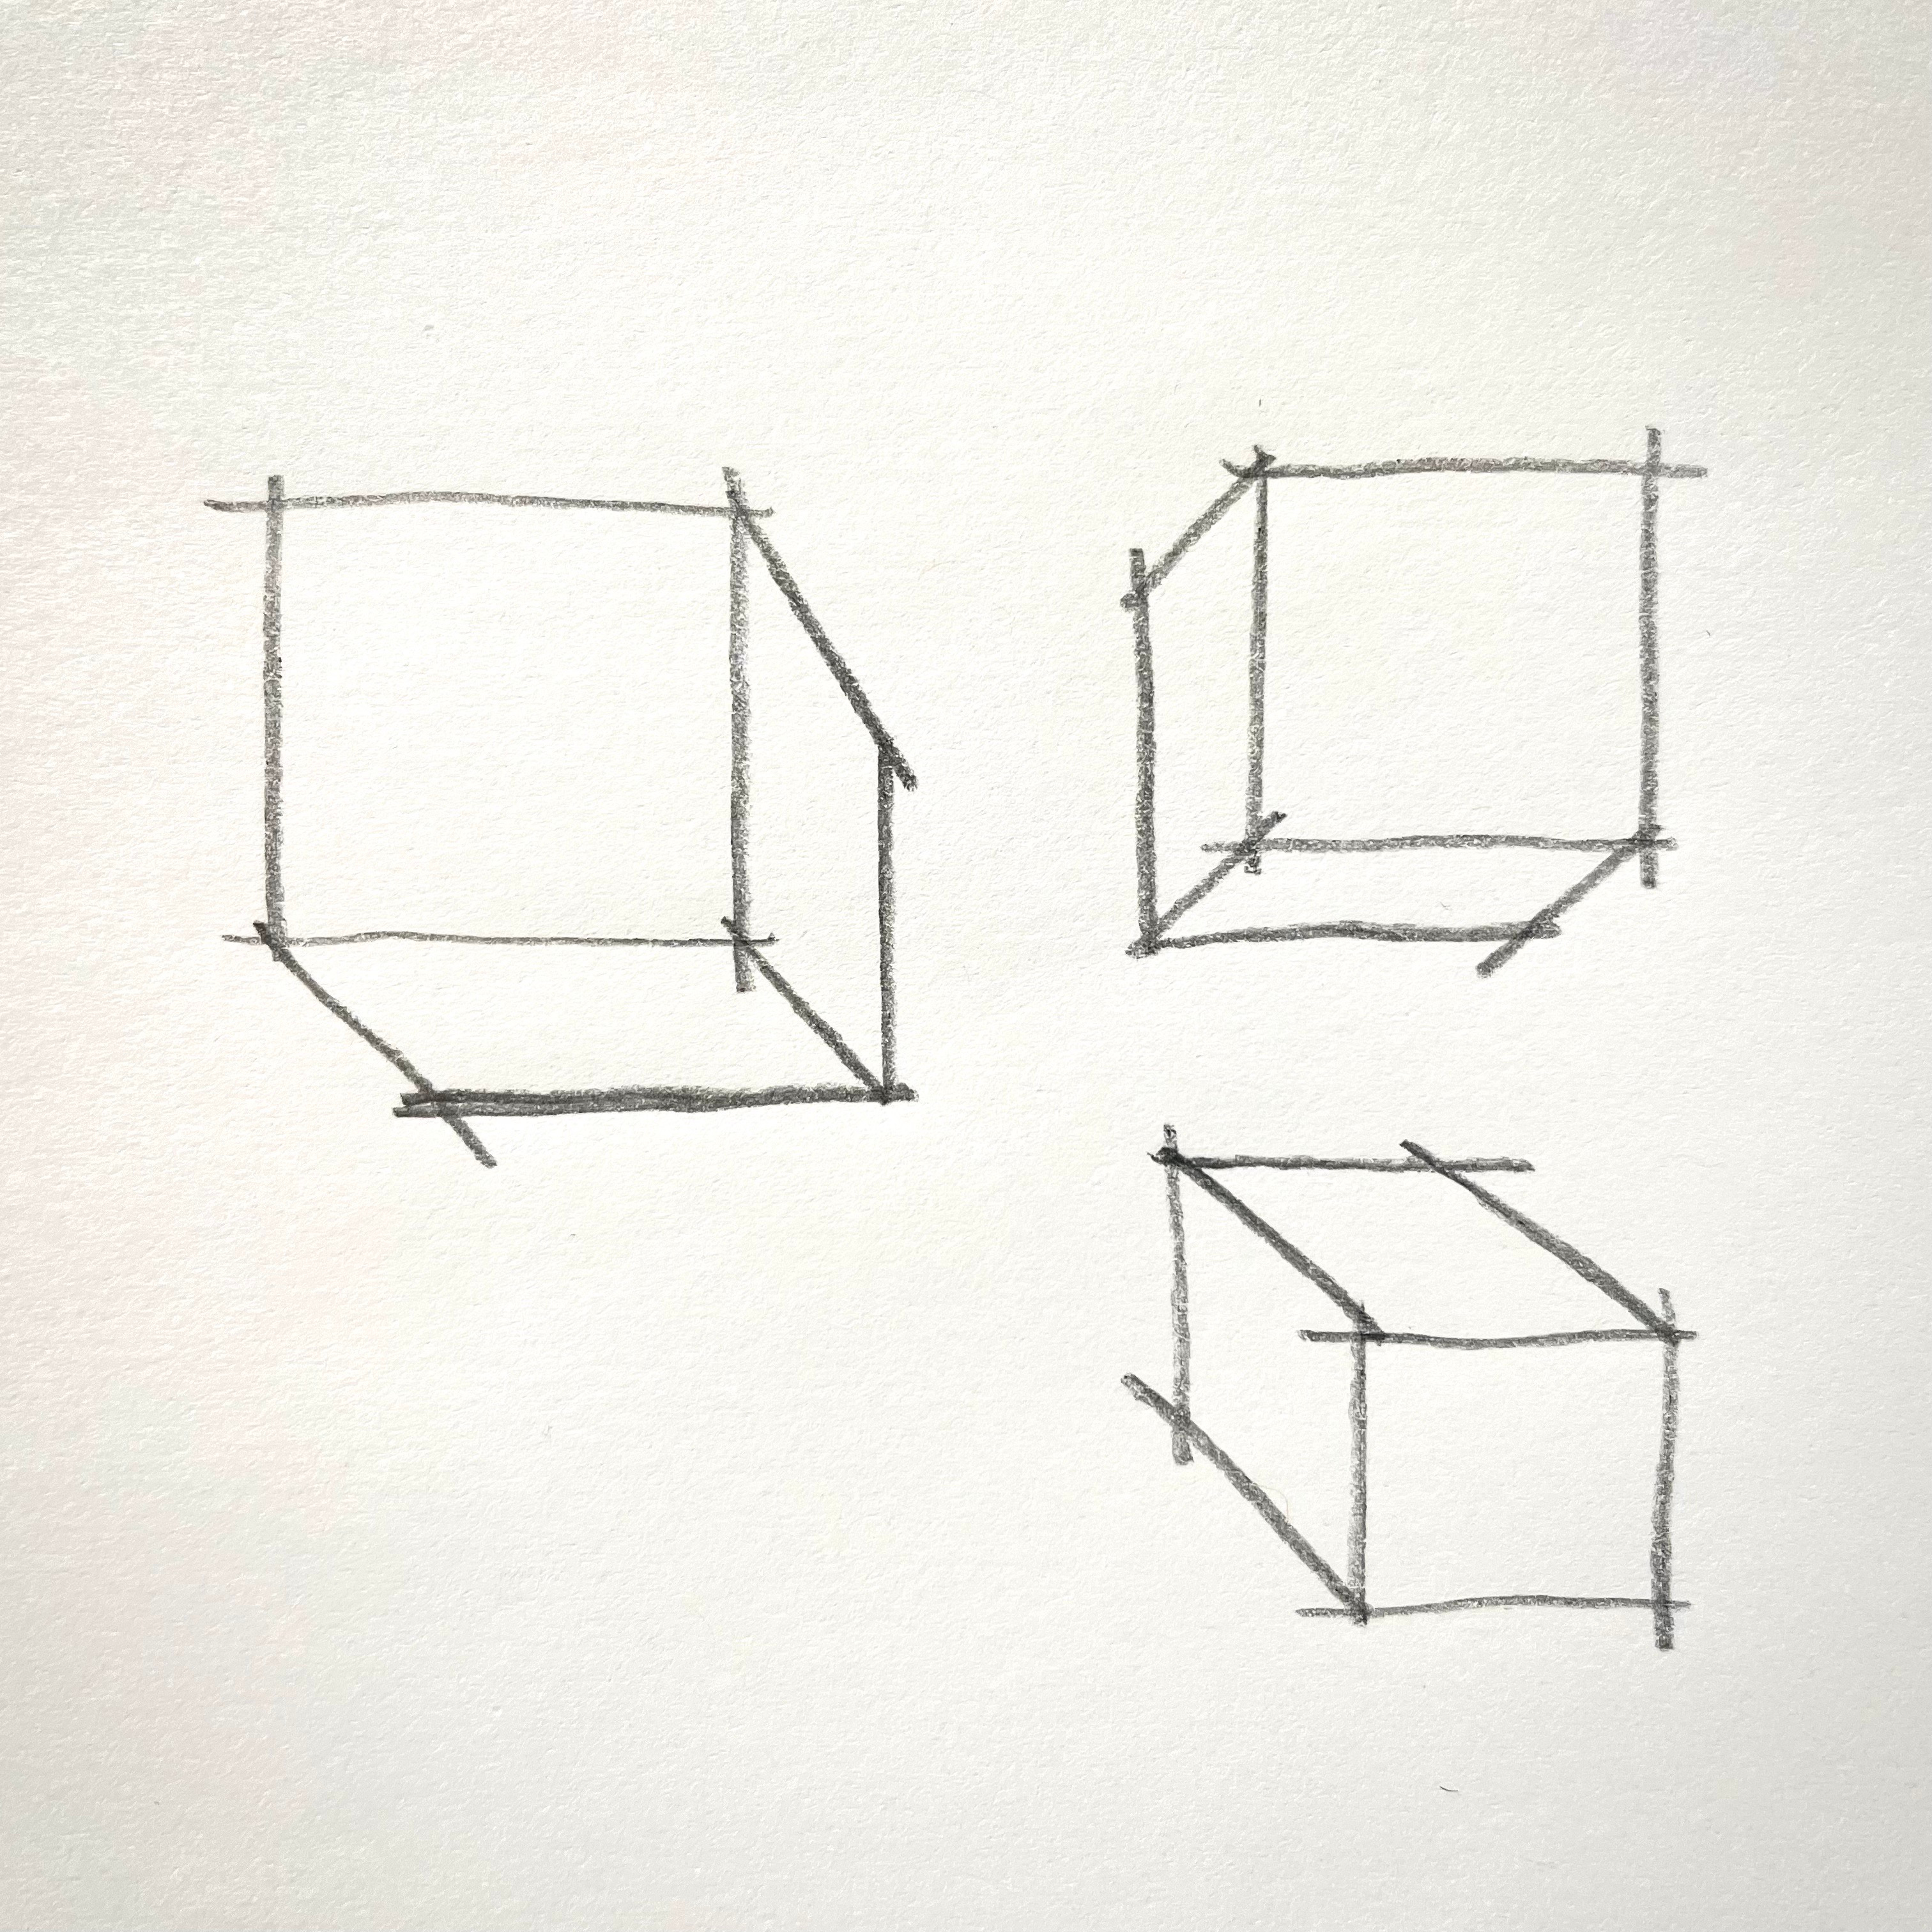
There are all sorts of variations you can do with these boxes. Once you have the methods down and can draw both ways from memory, try these variations. In each case, make sure you pay attention to which groups of lines should be parallel!
Start with a tilted rectangle or diamond (Method 1).
Start with a tilted Y shape (Method 2).
Instead of a regular Y shape, try an upside-down one. (Hint: you’ll see the bottom of the box, instead of the top.)
What other variations can you come up with? Try out various experiments. Try to make boxes of a variety of sizes and dimensions: tall ones, wide ones, wide and skinny ones, etc.
If you are up for a challenge, and are very careful about drawing your lines at the correct angles, you can try drawing boxes that overlap—one box behind another box.


Check Your Work
If one of your boxes looks “wonky” or “off,” it is very easy to check your work to find out how to fix it. Just look for 3 sets of 3 parallel lines. If one line is not parallel to its brothers, or is tilted “outward,” the box will look wrong. You may try using highlighters to mark each set of 3 as you are checking your work.
Memorize these two methods of drawing a box this week so that you can draw boxes correctly without looking at instructions. Just like memorizing your times tables speeds up math, memorizing how to draw a box will speed up your skills in drawing from imagination.
HAPPY DRAWING!
Thanks for participating in the Homeschool Art Course. Support my work with a like, comment, and share!